
Last Updated: October 22, 2026
Quick Summary
To test refurbished phone screen quality, run solid-color images in white, black, red, green, and blue at maximum brightness in a dark room, then check for dead pixels, touch dead zones, tint, and burn-in. A refurbished phone screen should pass glass, pixel, touch, and color uniformity checks before you buy.
- Wipe the glass with a microfiber cloth first, since smudges mimic scratches and discoloration.
- A dead pixel stays black on every color, while a stuck pixel stays locked on one color.
- Drag your finger in a grid in a drawing app to find touch dead zones and edge failures.
- Burn-in is permanent ghosting; image retention fades within a minute or two.
- A phone that fails two or more checklist items is a return.
Table of Contents
- Why the Screen Decides Whether a Refurbished Phone Is Worth It
- Before You Start: What You'll Need for a Screen Test
- Step 1: Inspect the Glass for Cracks, Chips, and Deep Scratches
- Step 2: Run the Solid-Color Screen Test for Dead Pixels and Discoloration
- Step 3: The Refurbished Phone Screen Dead Pixel Test, Done Properly
- Step 4: How to Check a Used Phone Touchscreen for Dead Zones and Edge Failures
- Step 5: How to Check iPhone Display for Discoloration, Brightness, and Viewing Angles
- Step 6: Spotting Burn-In, Image Retention, and Non-Original Screens
- Putting It All Together: Your Screen Inspection Checklist
- Frequently Asked Questions
Why the Screen Decides Whether a Refurbished Phone Is Worth It
The screen is the most expensive part of any phone and the part you look at every day, which makes knowing how to test refurbished phone screen quality the most valuable skill in the buying process.

Below are seven steps that take about ten minutes and catch the defects that matter. Most guides say "check the screen" without explaining what to look for, a quick glance proves nothing.
Refurbished phone screen condition is graded on visible damage, pixel health, touch response, and color uniformity. A device graded as fully functional should pass all four checks.
Before You Start: What You'll Need for a Screen Test
You need three things: a clean microfiber cloth, a bright room or direct daylight, and a few minutes of patience. No apps are required for the basic checks, though a screen test app helps for the deeper ones.
Wipe the glass first. Smudges and fingerprints mimic scratches and discoloration, and you will chase ghosts for ten minutes if the screen is dirty.
- A microfiber cloth (paper towels can micro-scratch oleophobic coatings)
- Bright overhead light or a window with daylight
- A white or plain background image saved to the phone
Step 1: Inspect the Glass for Cracks, Chips, and Deep Scratches
Hold the phone at an angle and scan the glass edge to edge for cracks, chips along the bezel, and deep scratches that catch your fingernail.
Run your fingernail across any line you find: if it catches, it is a deep scratch; if your nail glides over it, it is cosmetic surface wear.
Check the corners first: that is where drop damage lands, and a corner chip often spreads into a crack.
Step 2: Run the Solid-Color Screen Test for Dead Pixels and Discoloration
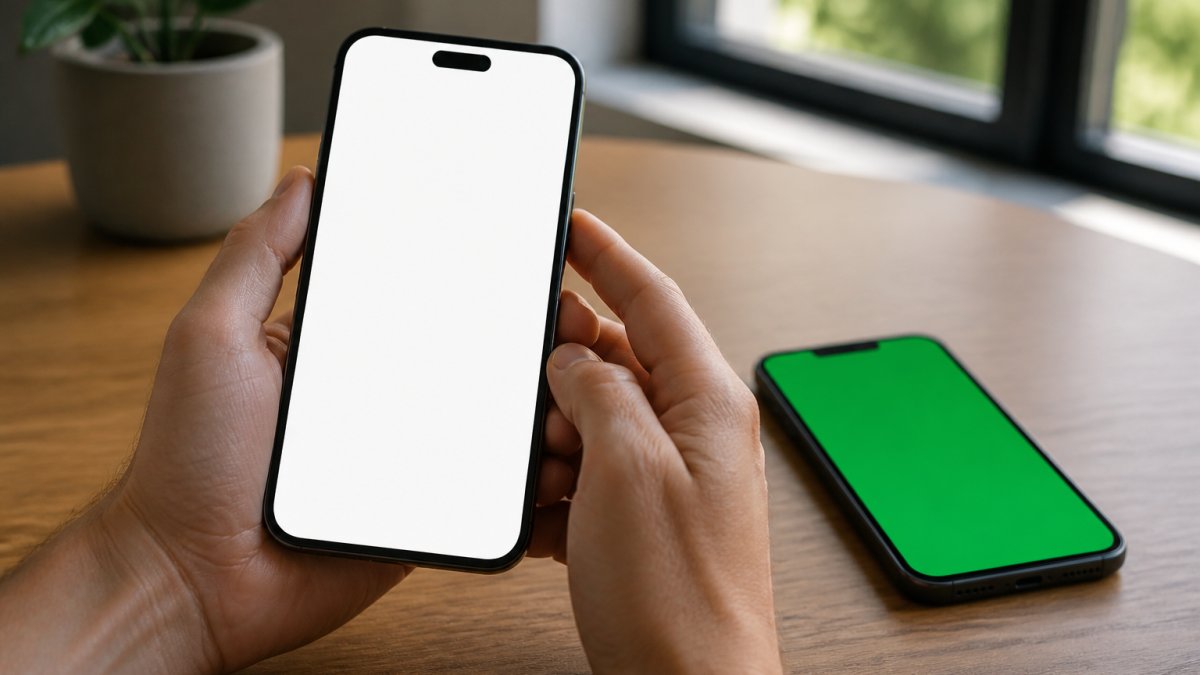
How to display each color. Save five full-resolution solid-color images to the photo library and open each full screen, use a free screen-test app that cycles colors on tap, or open a blank white page in the browser in landscape. Whichever you use, disable auto-brightness, set brightness to maximum, and turn off blue-light or night-shift filters, which shift color temperature and hide tint problems.
What each color reveals. Work through the colors in order and inspect slowly rather than tapping through in seconds.
- White: the single most revealing screen. Dead pixels appear as tiny black dots. Dust or debris trapped under the glass shows as dark specks that do not move when you tilt the phone. Yellow, pink, or blue patches indicate uneven backlight or panel aging. Faint gray smudges can be image retention.
- Black: reveals stuck pixels, which stay lit as red, green, blue, or white dots against black. It also exposes backlight bleed, the pale glow along edges and corners on LCD panels, and any light leaking through the frame. On OLED, true black should be uniformly black; a faint gray haze suggests panel wear or a non-original assembly.
- Red, green, and blue: each isolates one subpixel channel. A stuck subpixel shows as a dot of the wrong color on that screen. Color shift, where one area of the panel looks warmer or cooler than the rest, becomes obvious when you compare the same color across the whole surface.
Distinguishing the defects. A dead pixel is black on every color; a stuck pixel stays locked on one color across all five screens. Dust under the glass shifts or casts a tiny shadow when you tilt the phone, and backlight bleed is a soft edge glow, not a sharp dot. These categories carry different weight in a return decision: a single dead pixel in a corner is often tolerable, while a center cluster, a bright stuck pixel, or edge bleed during dark video is not.
Step 3: The Refurbished Phone Screen Dead Pixel Test, Done Properly
The refurbished phone screen dead pixel test works best in a dark room at maximum brightness.
Most people miss dead pixels because they test in a bright room at half brightness. Turn the lights down, push brightness to full, and scan in a slow grid, top-left to bottom-right.
Count what you find. One dead pixel in a corner is easy to live with.
Step 4: How to Check a Used Phone Touchscreen for Dead Zones and Edge Failures
To check a used phone touchscreen, open a drawing or notes app and drag your finger slowly across the display in a grid.
Work across in rows from the top-left, then repeat in columns, paying extra attention to edges and corners, where touch sensors most often fail after a drop.
- Draw a line along all four edges, close to the bezel
- Tap every corner repeatedly
- Test with two fingers at once to confirm multi-touch
Then check touch sensitivity through a screen protector, if one is installed. A cheap protector can dull response and make a healthy screen feel faulty.
Apple iPhone 11 - Fully Unlocked (Refurbished) →
Step 5: How to Check iPhone Display for Discoloration, Brightness, and Viewing Angles
To check iPhone display quality, open a white page at full brightness and look for yellow, pink, or blue tinting, then tilt the phone left, right, up, and down.
Discoloration often shows as a warm patch in one corner or a cooler band along an edge; on OLED, uneven brightness signals panel wear.
Take the phone outside if you can: a screen that looks fine indoors can wash out completely in daylight, and outdoor visibility is where cheaper replacement panels fall apart.
Step 6: Spotting Burn-In, Image Retention, and Non-Original Screens
OLED and LCD panels fail in different ways, and the same test image tells you different things depending on which you are looking at.
Burn-in versus image retention. Burn-in is a permanent ghost of a static image, keyboard, status bar, navigation bar, or app icon, faintly visible on solid colors.
Testing LCD panels. LCDs use a backlight, so failure modes differ.
Spotting a non-original or replacement screen. No single sign proves a screen is non-original, so weigh several together:
- Colors look oversaturated or washed out compared with a factory panel of the same model
- True Tone, auto-brightness, or ambient-light response behaves oddly or is missing
- The display sits slightly proud of the frame, with uneven gaps or a lip you can feel
A replacement screen is not automatically a dealbreaker, especially on an older device, but it should be disclosed and priced accordingly.
Documenting and deciding. Photograph every defect with the serial number or listing photo in frame, note the test color and brightness setting, and record whether it is permanent. Check the return window before you buy, the clock usually starts at delivery, and a documented defect found inside that window is far easier to resolve.
Putting It All Together: Your Screen Inspection Checklist
Run the checks in order and score each one. A phone that passes all six is a safe buy. A phone that fails two or more is a return.
| Check | What to Look For | Pass Criteria |
|---|---|---|
| Glass inspection | Cracks, chips, deep scratches | No cracks; scratches don't catch a nail |
| Solid-color test | Dead pixels, dust, tint patches | Clean, even color on all five screens |
| Dead pixel test | Black or stuck dots at full brightness | No clusters; isolated dots disclosed |
| Touch grid test | Gaps in drawing trail, edge failures | Full coverage, multi-touch works |
| Brightness and angles | Tint shift, washout outdoors | Consistent color, usable in daylight |
| Burn-in and originality | Ghost images, part warnings | No permanent ghosting; parts disclosed |
That checklist is the difference between a phone that lasts two years of college and one that annoys you by month three, and a seller who knows you will test properly tends to disclose defects up front.
For buyers who want the guesswork removed, our refurbished Apple lineup is inspected, tested, and quality checked before it ships, and every device carries a 30-day return policy. The FTC's guidance on used goods and warranty disclosures is worth a read so you know what a seller must tell you before purchase. You can also check the Apple support documentation on display diagnostics for model-specific test tools, and the CISA's mobile device security guidance for broader device checks.

Browse the Apple iPhone 11 - Fully Unlocked (Refurbished) at $412.78, a solid entry point with a 6.1-inch Liquid Retina HD display and a fingerprint-resistant oleophobic coating that makes scratch checks easy. The Apple iPhone 11 Pro Max - Fully Unlocked (Refurbished) at $533.78 pairs a 6.5-inch Super Retina XDR display with the same inspection process.
Frequently Asked Questions
How can I check a refurbished phone for dead pixels?
Open a solid-color image or a free screen test page and cycle through white, black, red, green, and blue. On each color, scan the whole display slowly for tiny dots that stay black, white, or the wrong color. A single stuck pixel is easy to miss, so hold the phone about 12 inches away and check one quadrant at a time. Then repeat with a fully black screen in a dim room, where bright dots show up clearly. Note any defect's location and count before you decide.
How do I test touchscreen responsiveness on a refurbished phone?
Turn on a drawing or notes app and drag your finger in slow horizontal lines from the top edge to the bottom, then vertical lines side to side. Gaps in the drawn line mean dead zones. Next, trace the entire border within 5 mm of the edge, since edge touch failures are common on phones with replacement screens. Finish by testing multi-touch: pinch to zoom in a photo and rotate the image with two fingers. If pinch, zoom, or rotation stutters, the digitizer may be failing.
What does screen burn-in look like and can it be fixed?
Burn-in appears as a faint ghost of a previous image, such as a keyboard, status bar, or app icon, that stays visible on solid gray or white backgrounds. Image retention is similar but fades after a few minutes. Burn-in on OLED panels is permanent and cannot be reversed by software. On a refurbished phone, view a full gray screen at about 50% brightness and look for uneven patches. Significant burn-in should lower the device's grade and the price you pay.
How can I tell if a refurbished phone has a non-original screen?
Check True Tone in Settings: if the toggle is missing or grayed out on an iPhone that should support it, the display may have been replaced without calibration. Look for uneven gaps around the bezel, a front camera that sits off-center, or colors that shift strongly at an angle. Also compare brightness and tint against a known-original phone of the same model. A replacement screen is not automatically bad, but it should be disclosed and reflected in the price.
A screen that fails the white, black, or touch test is a screen you will regret. Every refurbished device at Smartcare Marketplace goes through full inspection, testing, and repair before it reaches you, backed by a 30-day return policy and a curated lineup of Apple products at prices that make sense for students and budget-conscious households. Continue shopping with Smartcare Marketplace and find a phone whose display you can trust from day one.